Solar System – Design
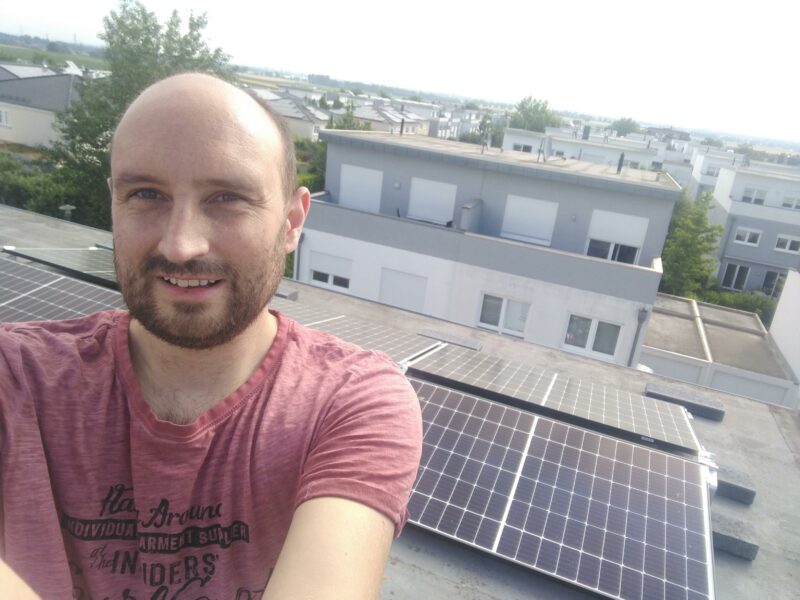
When we bought our house, one of the criteria was a photovoltaic system on the roof. In 2018, we finally found our dream home, with a flat roof with no shade — it was perfect! In this series of posts, I will describe the design and installation of our system. It is a 9.4kW system designed and built by me. My goals were to learn about solar and large power systems, as well as be environmentally friendly and reduce our carbon footprint.
If you are any bit handy, there are many many resources and communities online that can help. The overall system was not complicated.
In Part 1, I will discuss the design and installation of the panels. Part 2 will cover the electrical plan and inverter selection, and part 3 will cover the future plans for storage, which is currently in the design phase.
System Design
The design of the system depends on the location of installation. I am installing it on our roof, which is a flat roof covered in a plastic material. Our roof measures roughly 6 m x 10 m. There are three interference points on the roof: one satellite dish (to be removed, thanks Netflix!) one sewer vent, and one flue from the furnace. It’s helpful to draw a scale diagram, which I did here:
With the size of the roof noted, the next step is to determine the angle of the mount. Common flat roof mounts come in 10°, 15°, 30° and 45° angles. If you have a gabled roof, your angle will be that of your roof (which we will see, doesn’t matter much). I used http://www.solarpaneltilt.com/ to calculate the optimum angle for Frechen, which turns out to be 26° in summer, and 63° in winter, with an optimal angle of 41° for fixed systems. Let’s try with a 45° mounting system
I used https://www.cedgreentech.com/article/determining-module-inter-row-spacing to calculate how many rows of panels I can fit. The panels are generally around 1 m x 1.7 m. Thus, I can have one row of 10 panels when stood up lengthwise, or two rows of 6 panels when stood up widthwise. With this setup, most of the roof has gaps from the panels’ shading. This seemed like very few panels, so I wanted to know what the difference would be if I were to forego the optimum angle, and lay the panels flatter.
Using pvwatts, I came up with the following table. This shows the mounting angle in the first column, how many panels are possible to be mounted at this angle, and how much energy is generated for a year if I use 250 kWp panels. Ones marked with “this is impossible” assume a larger roof and serve as a comparison only:
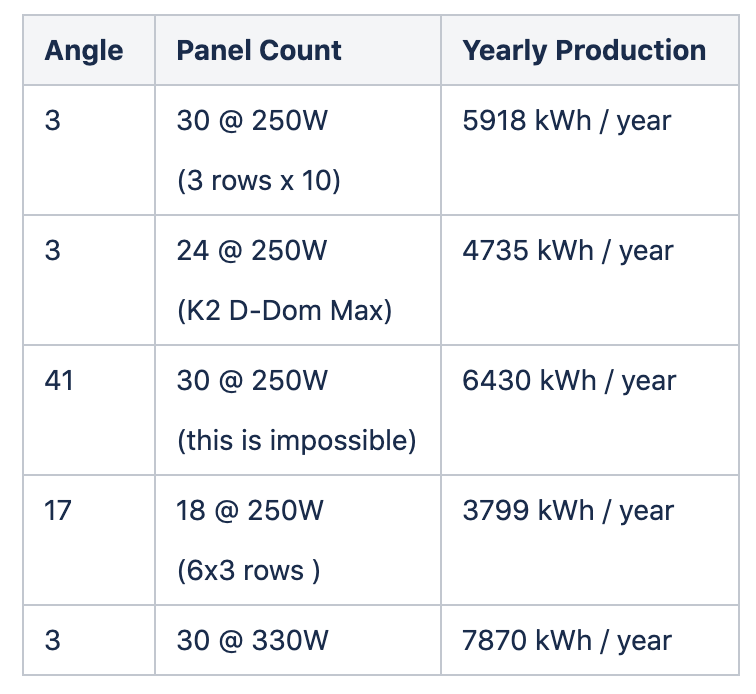
The results here are clear: installing more panels, at a suboptimum angle is better than installing fewer at the perfect angle. To assist in the calculations, I also created this spreadsheet. This is a plan of rows/columns of panels and their various angles:
https://docs.google.com/spreadsheets/d/1H0n8lJkdIfzUmGLbE2RpDAjiPS9U3xDYtQCe8eY_bFs/edit?usp=sharing
At this point, we are aiming for roughly 20 panels to be mounted at a low / flat angle.
Choosing mounting & panels
There are many tools from solar manufacturers which can help; the two I used were:
- K2 Base
- Lorenz SolarProTool (This is a re-branded and often used planning tool)
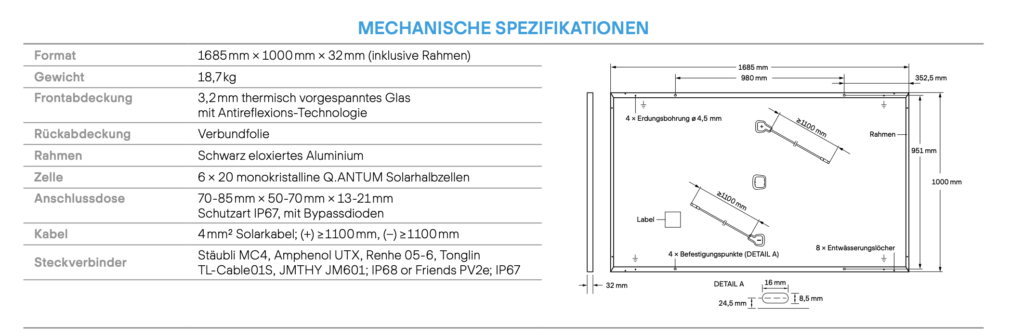
Both of these are from mounting hardware manufacturers and will generate a list of required materials. I first did my design in K2 Base, then our electrician recommended the Lorenz as mounting hardware, as this was what they use on their installs. I ended up designing my roof twice, once in Base and once in SolarProTool. It’s important to read all instructions, as these specify the minimum distance from the roof edge. This is not insignificant (0.5-1m) and will significantly reduce your available surface for panel installation. The tool needs to be configured with the roof and panels, so next was a choice of panels. I ended up going with Hanwha Q.Peak Duo G5 325 because:
- They are easily available (I got mine on Ebay!)
- Their size is slightly smaller at 1m x 1.685m – this became important as I am within 5cm of the minimum roof edge distance
- They have good shade handling (I am going with a string inverter rather than microinverters), thanks to the two half-panels in each panel
The tool needs to have the roof details, including any interferences like chimneys, gables, sources of shade, and electrical installations — basically anywhere the panels cannot be. Once this is entered, you can get the first rendering of the project. Here is my roof, with 22 panels total:
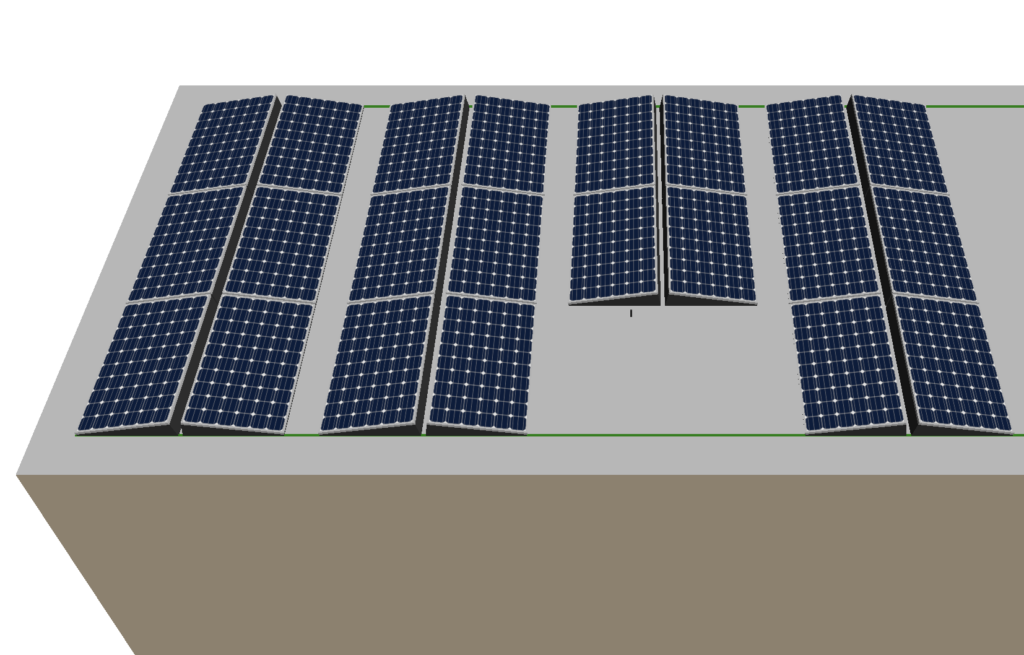
Note the missing two panels were the sewer vent and flue from the furnace.
Time to math
This is very important to get right: if it’s wrong, your panels may blow down in a wind storm and kill someone on the street. Get it wrong in the other direction and your roof may collapse under the load. Seek expert advice here!
Calculating the required ballast is fairly straightforward. In talking to a few installers while getting quotes, I doubt they’re doing anything different than plugging the numbers in to these tools. For safety, I did this calculation repeatedly with different values and also in different tools, to ensure the numbers I was getting were correct. Solar Protool offers a simple way to do the calculation: they can tell you your windzone based on location, and you need to configure the terrain category.
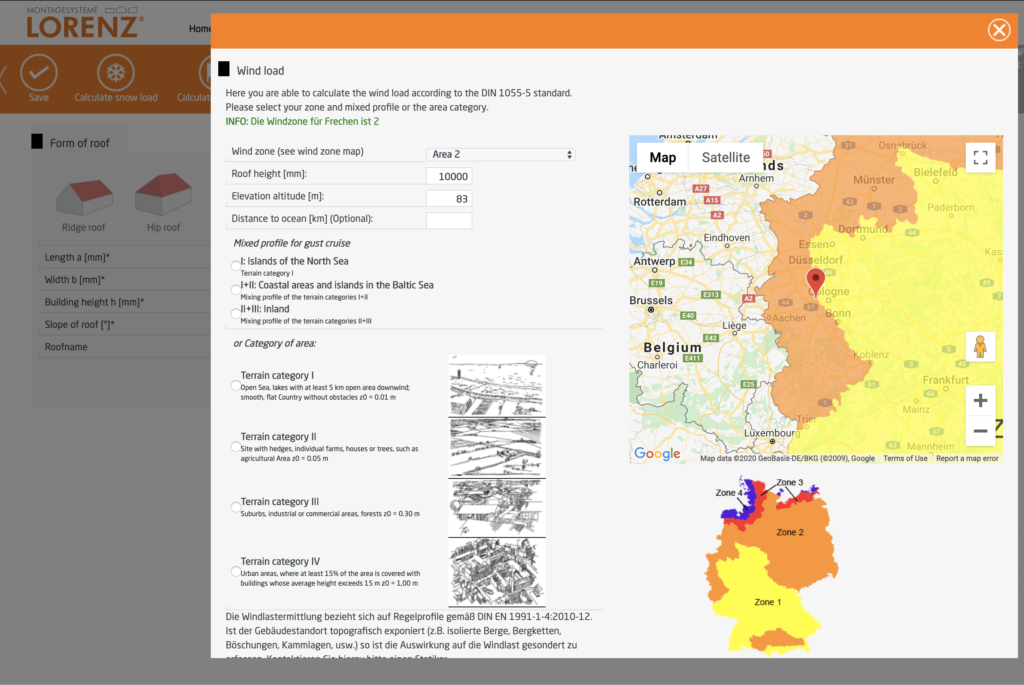
With this defined, it tells you the ballast you need on your roof to hold it down Below is the required ballast under the panels. The image below is from my preliminary planning where we were using 2.7kg patio bricks – the large numbers show how many bricks need to go where:
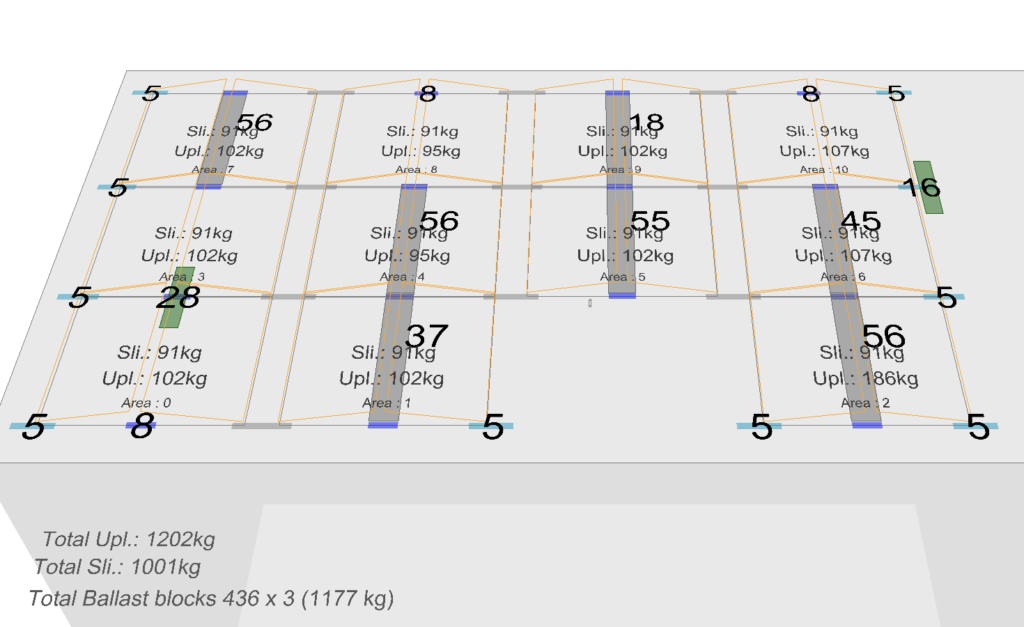
In the end we ended up using fewer bricks which were heavier. We went with 40kg blocks, which we cut in half. A total of 1177kg of cement will need to be installed (in addition to the 400kg of panels and 100kg of mounting hardware!). This number is highly dependent on the distance to the edge of the roof, and we are right at the allowable edge for the Lorenz system. We hired a Statiker to ensure our calculations were correct before proceeding.
The installation went mostly to plan. I built this contraption for getting stuff up onto the roof, currently with the panel “car” on the rails:

In part 2 I will cover the wiring and electrical details.
1 thought on “Solar System – Design”
Comments are closed.