Costume
November 11 is the beginning of the Karneval Season, and on November 11 I was out with my wife enjoying the partying. I noticed a number of costumes with lights on them, but I was very disappointed in them. They were usually nothing more than a string of Christmas lights wrapped around a body or body part, along with a battery box that turns them on or off. I figured I could do something better than that, and it would probably cost not much more than a typical costume, as costumes are usually overpriced for what you get.
After getting home on the 11th I immediately went about searching for ideas for an LED costume. The first video I found that I really liked was this one, which is more than just lights, it is timed to the music. During the Karneval season, you will always hear around 20 traditional karnevals songs over and over, mixed in with popular music from today. My original idea was to write a sequence for the 20 songs, so whenever one of the known songs comes on, my costume could behave similar to that from the video. In the rest of the time it would just blink in a cool fashion.
After tring with a week with Vixen 3, I found no simple way to save and trigger a light sequence made in vixen. Vixen only runs on windows and is meant to run a light show for your christmas lights, including being the source for music. Since the LED Suit would be portable, running windows is out of the question, and the suit needs to react to music and not expect to be the source of music and lighting design, so I decided to move away from Vixen.
I then looked into microphones, sound & beat detection and I came across this really simple circuit based on LM317s which includes a lowpass filter. I built this on the breadboard and began testing, it looks like with very little tweaking I can get reliable beat detection. I plan on including an override switch anyways in case the detector fails miserably.
The postman delivered my latest impulse buy, a set of 3 motinos from lowpowerlab.com. Since the original video had two costumes working in sync, what better use for a Motino than for running my suit and creating a wireless connection with my wife’s suit? Project scope increased to two suits with a wireless connection.
I began breadboarding with the components I had: Motino as the microcontroller, LM317-based amplifier and filter for sound detection and some RGB LEDs. This was fairly easy to accomplish, but it was a single light pulsing to music, a long ways off from a complete suit.
The next step was to get some external PWM drivers, that would free up pins on the Motino and allow many channels to be connected. These came in the form of WorldSemi’s WS2803 drivers, which are serially addressable (use only two pins on the motino) and provide a chainable 18-channel PWM output that is current controlled. Reviewing the video, there are 3 channels on each arm/leg (upper, lower, foot), so 12 channels plus two on the chest and two on the head a total of 16 channels. To get RGB in each of these, I would need three WS2803s to run the entire suit, at a cost of about 5€ for all three…not bad! I’d then have 18 channels of R-G-B to work with, two more than the video.
That covers off the channel control, the next step was to move from controlling a single LED to an array. The strips of LEDs that can be had for 12€/5m are almost always 12v and common annode. The cheapest/most compact way to run these is using amplifiers, which can be had for 0,80€ each. This mean each “channel” will cost $XXXX (amplifier, 1/6 of the ws2803, plus the length of LEDs you want). These amplifiers apparently can handle up to 4a per channel which I think is probably a bit exadurated, but we will be running them well under their rating. I had a few large amplifiers on hand where I tested driving a 5m strip from the WS2803 – worked like a charm! I ordered a batch of 50 tiny amplifiers. Here’s a picture of the different stages from new-in-box to ready-for-suit – remove the case, clip the power wires, remove the needle plugs, solder on 2.54mm headers and an exit cable and wrap in heatshrink (not pictured is hot glue which is in each end to make it water proof-er.
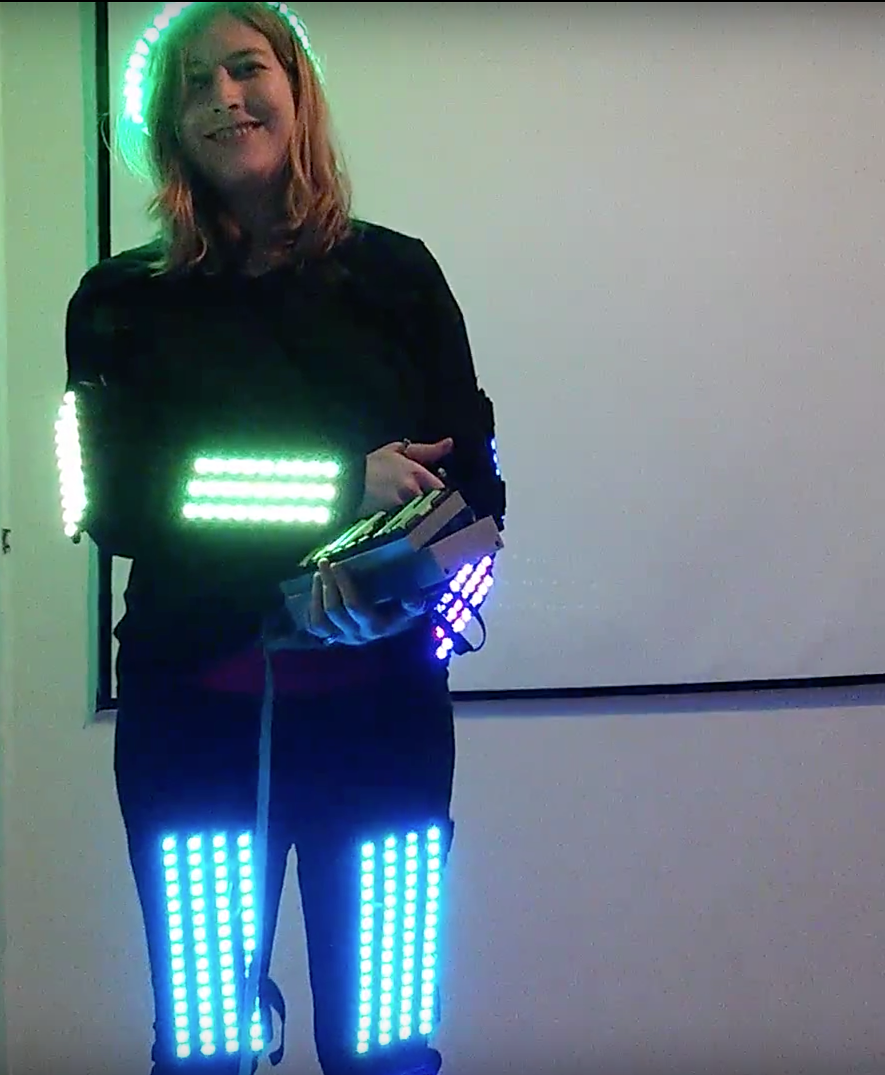
With the electronics functioning all on a board and all 18 channels behaving correctly with the beats, I turned my attention to the suit and attaching many strings of LEDs in a way that would be easy to wear. Using sports protection equipment (shingaurds) from hard plastic would be a good idea, except very expensive. Next I thought to get a large diameter PVC pipe and cut it in half, which would create large C shapes which could fit over legs and arms. I tried this, but unfortunately as shown it looks like a piece of what would normally go through pipe of that diameter, and was uncomfortable to wear (too tight, despite being the largest diameter that the local home improvement shop had). To solve the problem of lousy cuts I made by hand, I thought I could print myself a holder that was pretty close to the cut piece of pipe, then while it was still warm on the printer I could remove it and flex it to shape. This looked better, but had a big problem that the LED strips didn’t stick very well to it. I don’t think that they would last the night, especially being bumped around. The final design is much ligher, and is a frame that the LEDs are stuck to, and in addition to the two-sided tape which I doubt will hold, I have used heatshrink on the ends to protect from any liquids that may spill, and zipties hold the LEDs, amplifiers and cables to the frame.